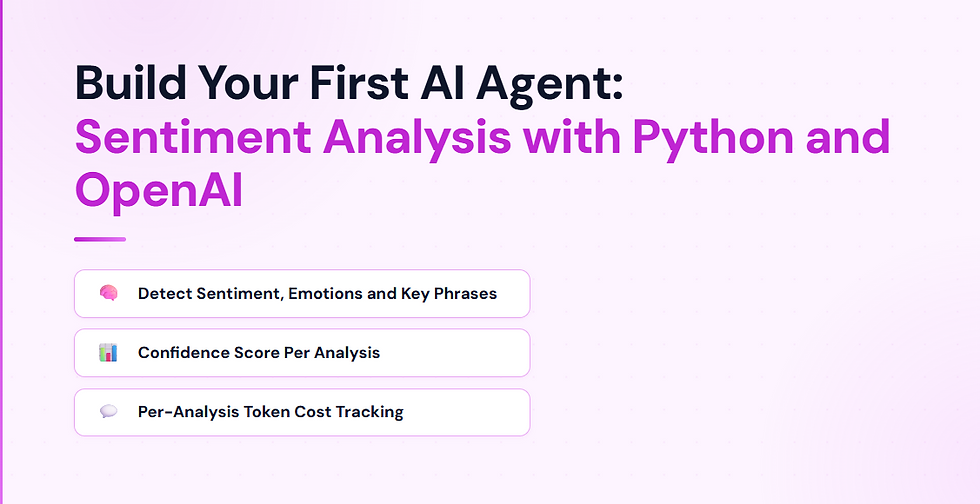
Build Your First AI Agent: Sentiment Analysis Agent with Python and OpenAI
- 10 hours ago
- 10 min read
Introduction
Understanding how people feel about a product, a service, or an idea is one of the most valuable things a business can do, and it is also one of the tasks where AI consistently outperforms rule-based approaches. A single review can carry joy, frustration, and sarcasm all at once. A rules-based keyword matcher misses this nuance. An LLM does not.
In this tutorial, we build a Sentiment Analysis Agent. It is a terminal application that takes any text input, sends it to GPT-4o-mini, and returns a structured breakdown: the overall sentiment, a confidence score, the emotions detected, the key emotionally significant phrases, and a plain-English explanation of why that sentiment was identified. Every result is saved to a local history.json file so you can review past analyses.
This is a great first AI agent project because it is self-contained, immediately useful, and demonstrates the core pattern behind almost every AI agent: send structured instructions to an LLM, receive structured output, present it clearly to the user.
What We’re Building
Feature | Detail |
Sentiment label | Positive, Negative, Neutral, or Mixed |
Confidence score | 0–100% |
Emotions detected | Joy, Anger, Fear, Sadness, Surprise, Disgust, Trust, Anticipation |
Key phrases | Up to 5 emotionally significant phrases from the input text |
Analysis summary | 1–2 sentence explanation of the detected sentiment |
Stats | Prompt tokens, completion tokens, input cost, output cost, total cost, elapsed time |
History | Every analysis saved to history.json with a timestamp |
The entry point is a terminal app where the user pastes any text — a review, a tweet, a complaint, a message — and the agent returns the full breakdown instantly.
What is a Sentiment Analysis Agent?
A sentiment analysis agent is an AI program that reads a piece of text and determines the emotional tone behind it. Unlike simple keyword matching (counting words like “good” or “bad”), an LLM-based agent understands context, sarcasm, mixed opinions, and subtle emotional cues.
The word agent here means the program has a defined goal (analyse sentiment), uses an AI model to achieve it, and takes action based on the result (displaying output, saving history). It is the simplest form of an AI agent — one step, one model call, one structured result — making it the ideal starting point before moving on to multi-step or multi-agent systems.
Tech Stack
Component | Tool |
AI Model | GPT-4o-mini |
API Client | openai Python SDK |
Terminal UI | rich |
Env Management | python-dotenv |
Persistence | JSON file (history.json) |
No external databases, no web servers, no complex setup. The entire agent runs as a single Python process.
Project Structure
sentiment_analysis_agent/
├── agent.py         # SentimentAgent class — OpenAI call + cost calculation
├── app.py           # Terminal entry point — input loop, display, history saving
├── history.json     # Auto-created on first run — stores every analysis
├── requirements.txt # openai, python-dotenv, rich
└── .env             # OPENAI_API_KEY and MODEL
Setting Up
1. Install Dependencies
pip install openai python-dotenv rich2. Configure Environment
Create a .env file in the project folder:
# Your OpenAI API key — get yours at https://platform.openai.com/api-keys
OPENAI_API_KEY=your_openai_api_key_here

# Model used for sentiment analysis (default: gpt-4o-mini)
MODEL=gpt-4o-mini
GPT-4o-mini handles sentiment analysis very well and costs a fraction of GPT-4o — typically under $0.0001 per analysis. The model is read from .env so you can swap it without touching the code.
Building the Agent — agent.py
The agent is a single class with one method. All the logic — prompt construction, API call, cost calculation, result packaging — lives here. app.py calls it and handles display; agent.py handles intelligence.
import json                   # parses the JSON string returned by the model into a Python dict
import os                     # reads OPENAI_API_KEY and MODEL from the environment after load_dotenv()
from openai import OpenAI     # synchronous OpenAI client — this agent runs in a simple input loop, not an async event loop
from dotenv import load_dotenv  # reads .env and injects values into os.environ before any os.getenv() calls

load_dotenv()  # must be called before os.getenv() — injects .env values into the process environment

_PRICING = {"input": 0.150, "output": 0.600}  # GPT-4o-mini rates per 1M tokens — used to calculate cost per analysis
The System Prompt
The system prompt is the core instruction that defines what the agent does. It constrains the model to return a specific JSON structure every time — no markdown, no explanation, just the data.
_SYSTEM_PROMPT = (
    "You are a sentiment analysis expert. Analyse the given text and return ONLY JSON: "
    '{"sentiment": "positive|negative|neutral|mixed", '        # one of four sentiment labels
    '"score": <integer 0-100 confidence>, '                    # how confident the model is — 100 means certain
    '"emotions": ["list of detected emotions from: joy, anger, fear, sadness, surprise, disgust, trust, anticipation"], '  # plutchik's wheel of emotions — widely used taxonomy
    '"key_phrases": ["list of up to 5 emotionally significant phrases from the text"], '  # exact quotes from the input that drove the sentiment
    '"summary": "1-2 sentence explanation of why this sentiment was detected"}.'          # human-readable justification
)
The prompt uses "positive|negative|neutral|mixed" to enumerate the valid sentiment values — this constrains the model’s output to a known set, making the downstream display logic reliable.
Call Metadata
_CALL_METADATA = {
    "dev_name":    "Ganesh",    # identifies who made the API call — appears in the OpenAI usage dashboard
    "project":     "codex-test",  # project label for grouping calls
    "environment": "local",       # marks this as a local development call, not production
    "purpose":     "testing",     # intent label — useful when reviewing API usage logs
}
Metadata is attached to every OpenAI API call. It does not affect the model’s output — it is purely for tracking and auditing in the OpenAI dashboard.
The Agent Class
class SentimentAgent:
    """Analyses the sentiment of any text using OpenAI and returns structured results."""

    def __init__(self):
        self.client = OpenAI(api_key=os.getenv("OPENAI_API_KEY", ""))  # synchronous OpenAI client — reads the key from .env
        self.model  = os.getenv("MODEL", "gpt-4o-mini")                # model name from .env — defaults to gpt-4o-mini if not set

    def analyze(self, text: str) -> dict:
        """Send text to the LLM and return a structured sentiment result."""
        response = self.client.chat.completions.create(
            model=self.model,                                            # model resolved from .env
            messages=[
                {"role": "system", "content": _SYSTEM_PROMPT},         # the sentiment analysis persona and JSON output format
                {"role": "user",   "content": f"Text to analyse:\n{text}"},  # the actual text the user submitted
            ],
            response_format={"type": "json_object"},  # forces the model to return valid JSON — no markdown fence, no prose
            max_tokens=300,                           # sentiment analysis output is concise — 300 tokens is more than enough
            metadata=_CALL_METADATA,                 # attached for dashboard tracking — does not affect model output
        )

        raw    = response.choices[0].message.content or "{}"  # choices[0] is the first (and only) completion — or "{}" guards against None
        result = json.loads(raw)                               # parse the JSON string into a Python dict

        prompt_tokens     = response.usage.prompt_tokens      # tokens used by the system prompt + user message
        completion_tokens = response.usage.completion_tokens  # tokens used by the model's JSON response
        input_cost  = round((prompt_tokens     / 1_000_000) * _PRICING["input"],  6)  # cost of input tokens in USD
        output_cost = round((completion_tokens / 1_000_000) * _PRICING["output"], 6)  # cost of output tokens in USD

        result["prompt_tokens"]     = prompt_tokens                        # appended to the result dict so app.py can display them
        result["completion_tokens"] = completion_tokens                    # appended for the detailed stats display
        result["total_tokens"]      = prompt_tokens + completion_tokens    # combined token count for the run
        result["cost"]              = round(input_cost + output_cost, 6)   # total cost for this analysis in USD
        return result  # returns the full dict including sentiment, emotions, phrases, summary, and all token/cost fields
Three things to note:
response_format={"type": "json_object"} — this API parameter forces GPT-4o-mini to return valid JSON. Without it, the model might wrap the JSON in a markdown code fence or add explanation text, which would break json.loads().
Token counts in the result — the agent appends prompt_tokens, completion_tokens, total_tokens, and cost to the result dict before returning it, so app.py never has to recalculate them.
Synchronous client — this agent uses OpenAI (not AsyncOpenAI) because the terminal input loop is synchronous. There is no async event loop to integrate with, so the simpler synchronous client is the right choice.
Building the Terminal App — app.py
The app handles everything the user sees: the input loop, the colour-coded output, the stats display, and saving results to history.
Imports and Constants
import json          # reads and writes history.json
import time          # measures elapsed time from input submission to result display
from datetime import datetime  # generates ISO 8601 timestamps for history records
from pathlib import Path        # constructs the history.json path relative to app.py

from rich.console import Console  # rich console — renders coloured text and panels in the terminal
from rich.panel import Panel      # renders the analysis summary inside a bordered box
from rich.rule import Rule        # renders a horizontal divider line (imported but used via console.rule())

from agent import SentimentAgent  # the agent class that performs the OpenAI call

HISTORY_FILE = Path(__file__).parent / "history.json"  # history.json sits next to app.py — Path(__file__).parent anchors it to the script's directory

console = Console()             # single Console instance shared by all display functions
agent   = SentimentAgent()      # single agent instance reused for every analysis in the session
Colour and Emoji Maps
SENTIMENT_STYLE = {
    "positive": "bold green",   # green — universally associated with positive outcomes
    "negative": "bold red",     # red — signals problems and negative feedback
    "neutral":  "bold yellow",  # yellow — neither good nor bad, middle ground
    "mixed":    "bold cyan",    # cyan — a distinct colour for ambiguous, mixed-signal text
}

SENTIMENT_EMOJI = {
    "positive": "😊",   # smiling face — instantly communicates a positive result
    "negative": "😞",   # disappointed face — immediately signals a negative finding
    "neutral":  "😐",   # neutral face — no strong signal either way
    "mixed":    "🤔",   # thinking face — something is going on but it is not clear-cut
}
Both dicts are keyed by the sentiment string the model returns. Lookups use .get(sentiment, default) so an unexpected model value falls back gracefully rather than raising a KeyError.
Saving History
def save_history(text: str, result: dict) -> None:
    history = []
    if HISTORY_FILE.exists():             # check if the file exists — on first run it does not
        try:
            history = json.loads(HISTORY_FILE.read_text(encoding="utf-8"))  # load existing records
        except json.JSONDecodeError:
            history = []                  # if the file is corrupted, start fresh rather than crashing
    history.append({
        "timestamp": datetime.now().isoformat(),  # ISO 8601 timestamp — sortable and unambiguous
        "text":      text,                         # the original input text — stored so each record is self-contained
        "result":    result,                       # the full result dict including sentiment, emotions, tokens, and cost
    })
    HISTORY_FILE.write_text(json.dumps(history, indent=2, ensure_ascii=False), encoding="utf-8")  # write the full list back — indent=2 keeps the file human-readable
Every analysis is appended to history.json as a new entry in a JSON array. The file grows with each session and can be opened at any time to review past results.
Displaying Results
def print_result(text: str, result: dict) -> None:
    sentiment = result.get("sentiment", "unknown")   # one of: positive, negative, neutral, mixed
    score     = result.get("score", 0)               # 0–100 confidence score from the model
    emotions  = result.get("emotions", [])           # list of detected emotions — may be empty for very neutral text
    phrases   = result.get("key_phrases", [])        # up to 5 emotionally significant phrases from the input
    summary   = result.get("summary", "")            # 1–2 sentence explanation of the sentiment
    tokens    = result.get("total_tokens", 0)        # combined token count for the API call
    cost      = result.get("cost", 0)                # total cost of the analysis in USD

    style = SENTIMENT_STYLE.get(sentiment, "white")  # look up the rich style — fall back to white for unexpected values
    emoji = SENTIMENT_EMOJI.get(sentiment, "")       # look up the emoji — fall back to empty string if not found

    console.print()
    console.print(f"  Sentiment  : [{style}]{emoji}  {sentiment.title()}[/{style}]   "
                  f"(confidence {score}%)")           # sentiment label in colour + confidence score on the same line

    if emotions:
        console.print(f"  Emotions   : {', '.join(e.title() for e in emotions)}")  # .title() capitalises each emotion — "joy" becomes "Joy"

    if phrases:
        console.print("\n  [bold]Key phrases:[/bold]")
        for phrase in phrases:
            console.print(f"    [dim]›[/dim] {phrase}")  # dim arrow bullet — visually separates each phrase

    if summary:
        console.print()
        console.print(Panel(
            summary,
            title="[bold]Analysis[/bold]",
            border_style=style.replace("bold ", ""),  # strip "bold " — Panel border_style does not support font weight modifiers
            padding=(0, 2),                            # no vertical padding, 2 chars horizontal — keeps the panel compact
        ))

    prompt_tokens     = result.get("prompt_tokens", 0)      # tokens used by the system prompt + user input
    completion_tokens = result.get("completion_tokens", 0)  # tokens used by the model's JSON response
    input_cost  = round((prompt_tokens     / 1_000_000) * 0.150, 6)  # GPT-4o-mini input rate: $0.150 per 1M tokens
    output_cost = round((completion_tokens / 1_000_000) * 0.600, 6)  # GPT-4o-mini output rate: $0.600 per 1M tokens

    console.print("\n  [bold]Stats:[/bold]")
    console.print(f"    Prompt tokens     : {prompt_tokens}")      # tokens in the request (system prompt + user text)
    console.print(f"    Completion tokens : {completion_tokens}")  # tokens in the model's response
    console.print(f"    Total tokens      : {tokens}")             # sum of prompt and completion tokens
    console.print(f"    Input cost        : ${input_cost:.6f}")    # cost of the prompt tokens in USD
    console.print(f"    Output cost       : ${output_cost:.6f}")   # cost of the completion tokens in USD
    console.print(f"    Total cost        : ${cost:.6f}")          # combined cost — typically under $0.0001 per analysis
    console.print(f"    Time              : {result.get('elapsed', 0)}s")  # wall-clock time from submission to result
The Input Loop
def run() -> None:
    print_header()   # prints the title rule
    console.print("  Paste or type any text and press Enter.  Type [bold]exit[/bold] to quit.\n")

    while True:
        try:
            text = input("  Text: ").strip()   # .strip() removes accidental leading/trailing whitespace
        except (KeyboardInterrupt, EOFError):
            console.print("\n  Goodbye.")
            break   # Ctrl+C or piped input ending — exit cleanly without a traceback

        if not text:
            continue   # ignore empty input — loop back to the prompt
        if text.lower() in ("exit", "quit"):
            console.print("  Goodbye.")
            break   # user typed exit or quit — stop the loop

        console.print("  [dim]Analysing...[/dim]")  # immediate feedback — shown while the API call is in flight

        try:
            start  = time.time()                             # record start time before the API call
            result = agent.analyze(text)                    # send the text to the agent and wait for the result
            result["elapsed"] = round(time.time() - start, 2)  # compute elapsed time and attach it to the result dict
        except Exception as exc:
            console.print(f"  [red]Error: {exc}[/red]")
            continue   # on error, skip the display and loop back to the prompt

        print_result(text, result)   # render the full analysis to the terminal
        save_history(text, result)   # append this result to history.json
        console.print()
        console.rule()    # horizontal divider between analyses
        console.print()
time.time() is called immediately before and after agent.analyze() — the difference gives the wall-clock elapsed time including the full HTTP round-trip to the OpenAI API. The elapsed time is attached to the result dict so print_result can display it without needing a separate parameter.
Running the Agent
python app.pyThe terminal displays:


What to Expect Per Sentiment Type
Input type | Typical sentiment | Notes |
Positive review | Positive, 85–98% | High confidence, emotions: joy, trust |
Angry complaint | Negative, 88–97% | Emotions: anger, disgust |
Factual statement | Neutral, 75–90% | Few or no key phrases |
Mixed review | Mixed, 70–85% | Lower confidence — genuinely ambiguous |
Sarcasm | Negative or Mixed | LLM handles sarcasm better than keyword matching |
Who Can Benefit
Students learning Python and AI who want a real, working agent to study and build on
Developers building a foundation before moving to more complex multi-agent systems
Product teams who want to understand how sentiment analysis works before integrating it into a pipeline
Businesses that need to analyse customer reviews, support tickets, or social media feedback
Researchers exploring how LLMs interpret emotional tone across different text types
How Codersarts Can Help
Building production AI agents — whether for sentiment analysis, document processing, or customer support automation — requires solid knowledge of prompt engineering, API integration, output parsing, and system design. If you need help building a custom AI agent for your use case, Codersarts offers end-to-end development and mentorship.
Custom AI agent development tailored to your domain
One-on-one mentorship and code reviews
Project-based learning with real-world applications
Get in touch: codersarts.com | contact@codersarts.com
Continue Your AI Learning Journey with Codersarts
If you enjoyed this article and would like to discover more about modern AI applications, production-ready LLM systems, and real-world RAG and MCP implementations, be sure to explore these other blogs from Codersarts:
Build a Cost-Efficient Writing Quality Checker with Tiered Model Routing and OpenAI
Build Your First A2A Agent: An Email Drafting Pipeline Using Python and OpenAI
Building an AI Interview Prep Agent with Qwen 3.7 Max and Streamlit
https://www.codersarts.com/post/building-an-ai-interview-prep-agent-with-qwen-3-7-max-and-streamlit
Building an AI Book Recommender with Kimi K2 and Streamlit
https://www.codersarts.com/post/building-an-ai-book-recommender-with-kimi-k2-and-streamlit


Comments